How to secure your Enterprise Application via PIM
This blog post demonstrates how to securely enable Single Sign-On (SSO) for sensitive enterprise applications. While commonly used for tools like RMM platforms (e.g., NinjaOne, N-Able, Kaseya) or business software (e.g., Informer, SimeonCloud), SSO configurations often grant access without fully considering security implications. Although group memberships can restrict access, this guide will show you how to enhance security even further by leveraging Privileged Identity Management (PIM).
Table of Contents
What is PIM?
Privileged Identity Management provides time-based and approval-based role activation to mitigate the risks of excessive, unnecessary, or misused access permissions on resources that you care about. Here are some of the key features of Privileged Identity Management:
- Provide just-in-time privileged access to Microsoft Entra ID and Azure resources
- Assign time-bound access to resources using start and end dates
- Require approval to activate privileged roles
- Enforce multifactor authentication to activate any role
- Use justification to understand why users activate
- Get notifications when privileged roles are activated
- Conduct access reviews to ensure users still need roles
- Download audit history for internal or external audit
- Prevents removal of the last active Global Administrator and Privileged Role Administrator role assignments
More information can be found here: https://learn.microsoft.com/en-gb/entra/id-governance/privileged-identity-management/pim-configure
Requirements
- Single Sign On Connection
- Microsoft Entra ID P2
Configuration
This section will guide you through the process of configuring PIM to secure access to your sensitive enterprise applications. We’ll focus on a common scenario where administrative access to an application is granted via membership in a Microsoft Entra ID security group.
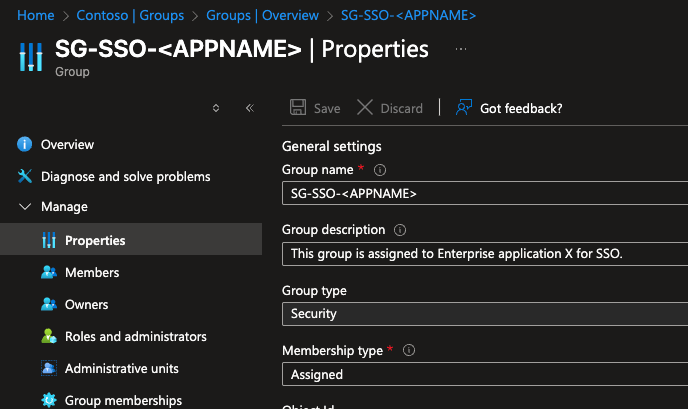
Step 1: Create Group
In this step we’re configuring the belonging Entra group and to make sure that SSO is blocked for everyone except this created SSO Entra group.
- Open Groups
- Click on New group
- Create your security group with the belonging group name and ** group descriptio**n
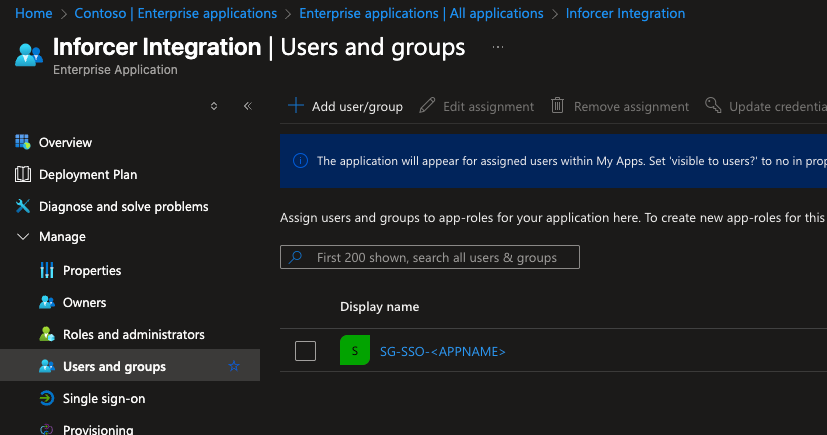
Step 2: Confirm Existing SSO Integration
Before implementing PIM, verify that your sensitive application (e.g., Inforcer) is already integrated with Microsoft Entra ID for Single Sign-On.
- Open the Microsoft Entra.
- Navigate to Enterprise Applications
- Locate your specific application (e.g., “Inforcer Integration”).
- Under the Manage section, click Single sign-on and confirm that SSO is configured and operational.
- Under Users and groups section, Add user/group > Select your created group
Step 3: Configure PIM for Group Membership
Onboard security group into PIM
We will now bring the identified administrative security group under PIM management, allowing us to enforce just-in-time access.
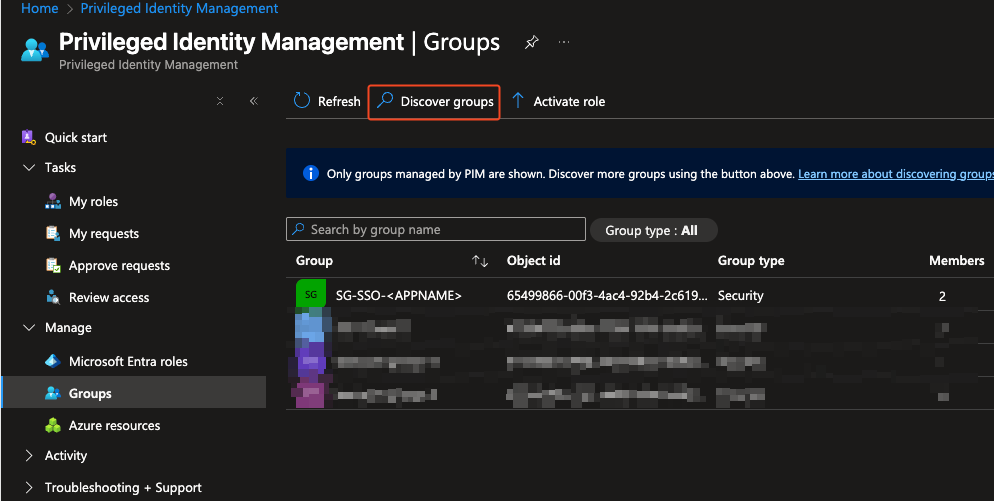
- In the Microsoft Entra admin center, navigate to ID Governance > Privileged Identity Management.
- In the left-hand navigation, under Manage, click Groups.
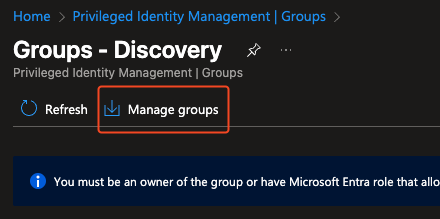
- On the Groups blade, click Discover groups.
- Search for your security group
- Select the group and click Manage group, then Onboard group. This action makes the group a PIM-eligible resource.
Screenshots
X

Configure PIM Settings
Once onboarded, configure the activation settings for the “Member” role of your security group. These settings define how users activate their privileged access.
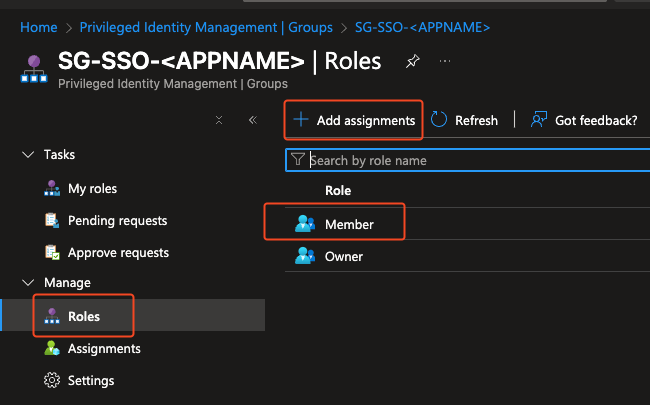
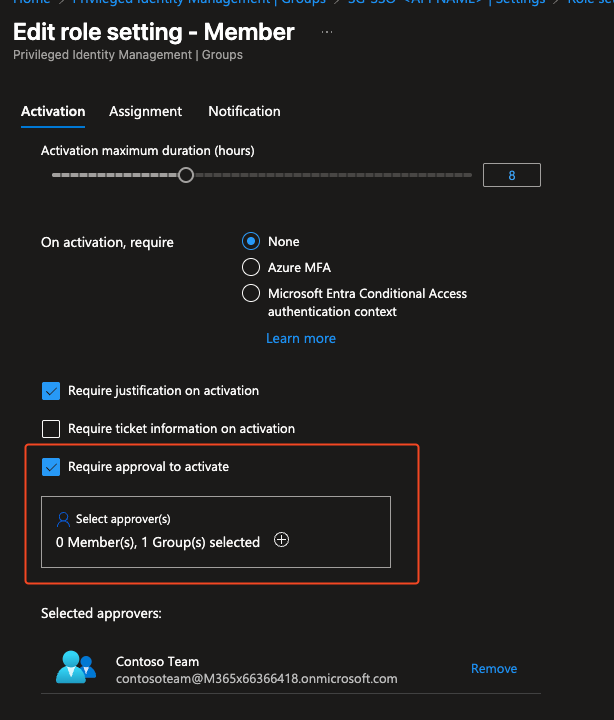
- From the PIM blade, click Groups, then select your newly onboarded administrative group.
- In the left-hand navigation, click Manage > Roles.
- Select the Member role.
- Select Add Assignments
- Select Users to make them eligible
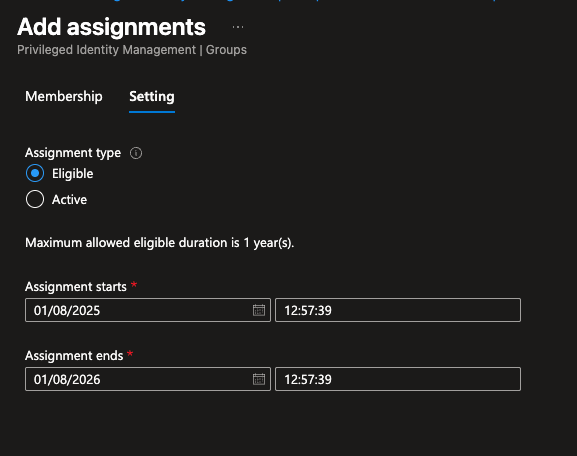
- Go to Settings:
Assignment type: Eligible
- Select your duration
- Select Assign
- **Now the user(s) are an eligible member. **
Screenshots
X
Optional: Add an Approval Workflow to PIM Activation
While requiring MFA and justification provides significant security, adding an approval workflow introduces a layer of human oversight. This ensures that no one can gain privileged access without a designated approver’s explicit consent, creating a critical security gate for every activation request.
To enable this, we’ll revisit the role settings for the group in PIM.
- In the Microsoft Entra admin center, navigate to ID Governance > Privileged Identity Management > Groups.
- Select your administrative security group.
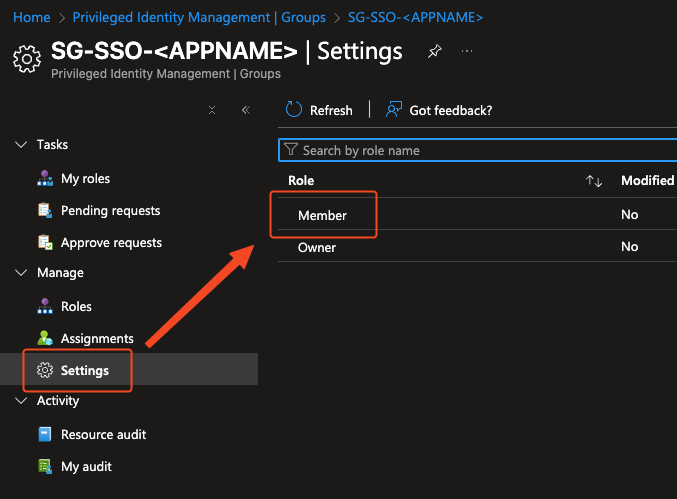
- In the left-hand navigation, click Settings > Member.
- Locate the setting for Require approval to activate and turn on this checkbox.
- Under Select approvers, choose the users or groups who will be responsible for approving activation requests. It is a best practice to assign a group for this purpose to ensure there is always more than one person available to approve requests.
- Click Update to save the changes.
With this setting enabled, whenever a user requests to activate their privileged access, an approval request will be sent to the designated approvers. The user will not gain access until the request is approved. This workflow creates an important check-and-balance system for your administrative tasks.
Screenshots
X
Step 4: Create Conditional Access Policy
A key part of securing this workflow is creating a Conditional Access policy that enforces a strict “PIM-only” path for your sensitive application. This policy will act as a gatekeeper, blocking all access to the application by default, with one critical exception: it will exclude a security group that is managed by PIM. This setup ensures that the only way to gain access is to activate via PIM.
Here is how to create this Conditional Access policy in the Microsoft Entra admin center:
- Navigate to the Microsoft Entra admin center and go to Entra ID > Conditional Access.
- Click Create new policy.
- Fill in your Conditional Access Policy Name
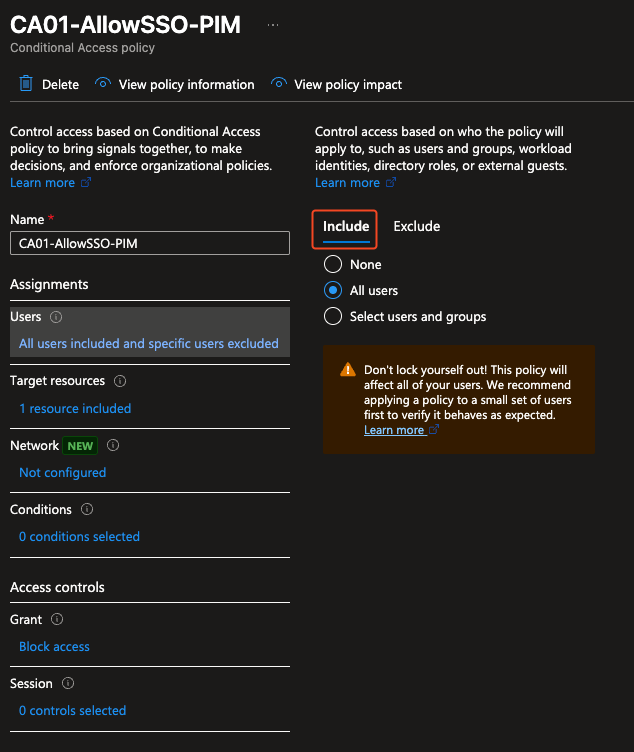
- On the Assignments section, click Users.
Under the Include tab, select All users.
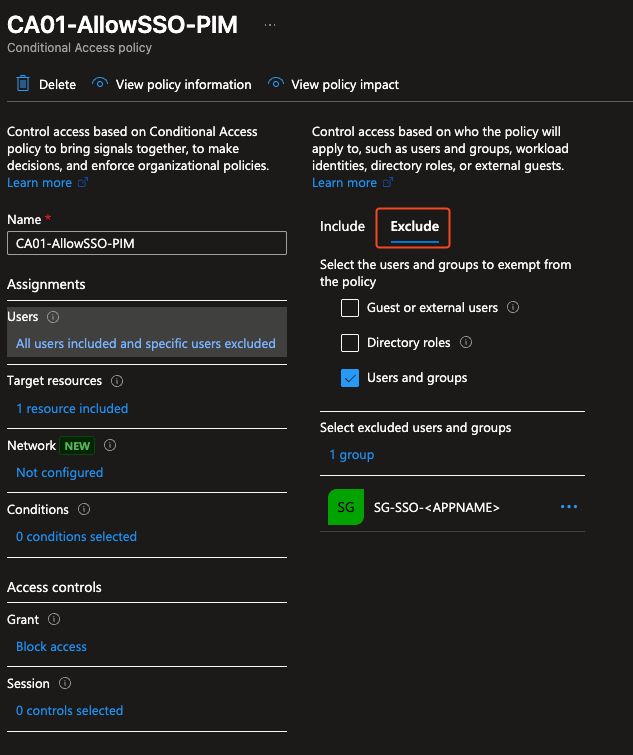
- Under the Exclude tab, select Users and groups. Search for the created security group and select this group. This is the group that will be exempt from this blocking policy.
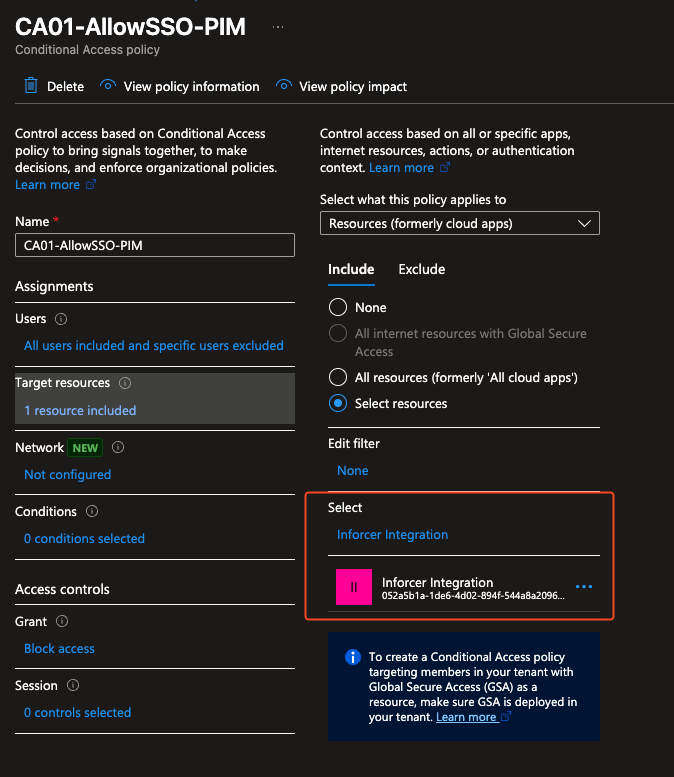
- Next, under the Assignments section, click Target resources.
Select Cloud apps.
- Under the Include tab, choose Select apps, and then search for and select your specific enterprise application (e.g., “Inforcer Integration”).
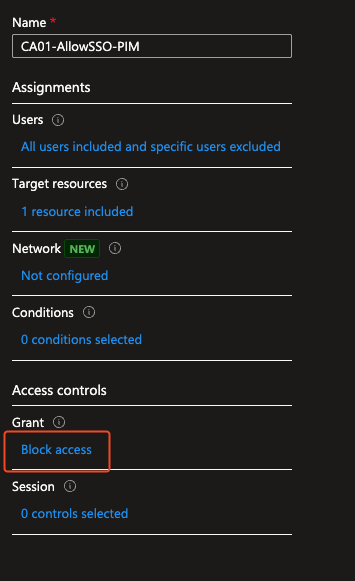
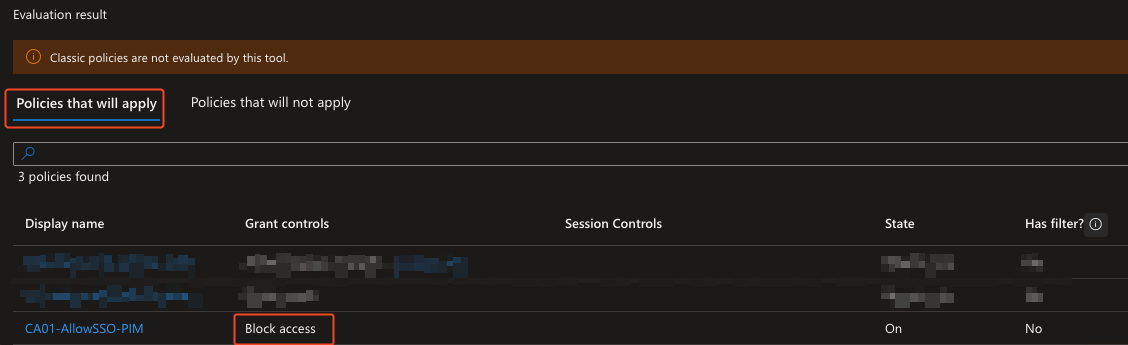
- Under the Access controls section, click Grant.
Select Block access.
- Set Enable policy to On and click Create.
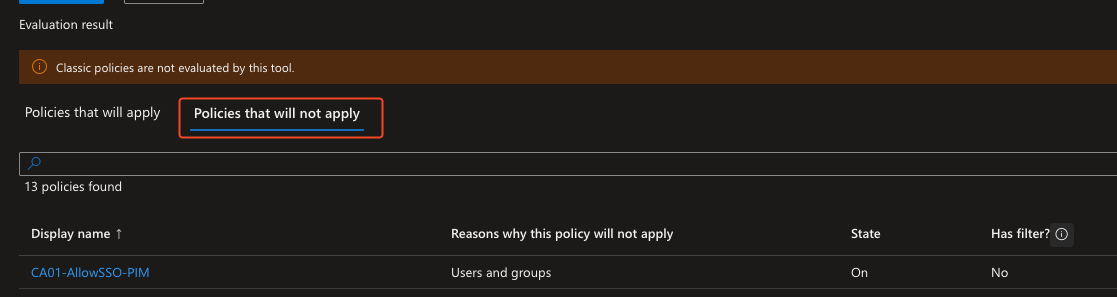
This policy is now active. It will block all users from accessing the application unless they are a member of the excluded group. Because PIM manages temporary membership in that group, this effectively forces all administrative access to go through your PIM activation workflow.
Screenshots
X
Test the PIM activation Workflow
It’s crucial to test the entire activation flow from an eligible user’s perspective.
- Log in as a user who has been assigned as “eligible” to the administrative group’s PIM role.
- Attempt to access your sensitive application (e.g., Inforcer). Initially, the user should not have administrative privileges.
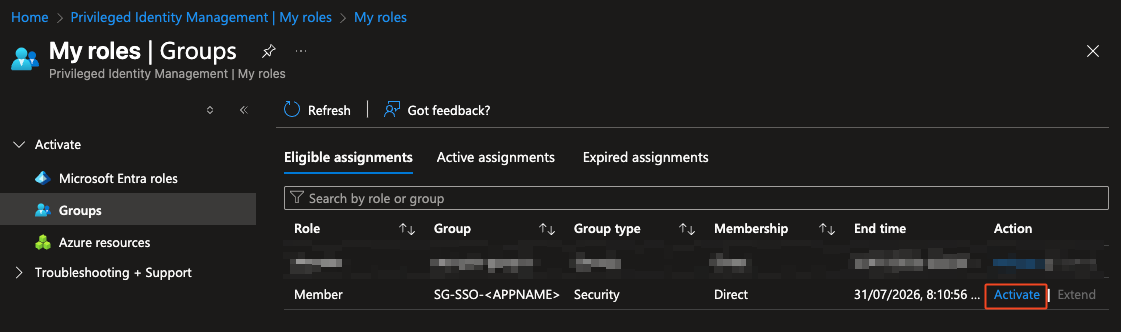
- Have the user navigate to the Microsoft Entra admin center > ID Governance > Privileged Identity Management > My roles > Groups.
- Under Eligible Assignments, they should see the administrative group. Click Activate.
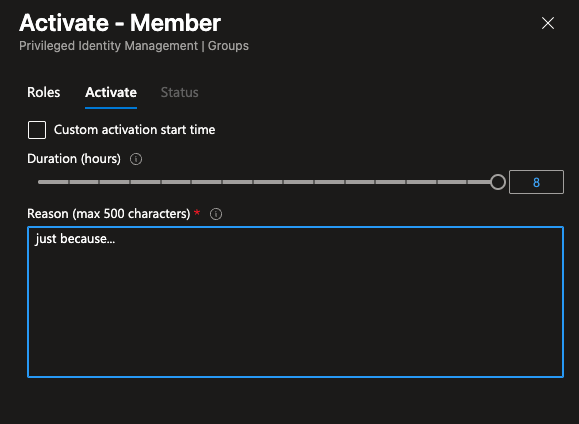
- Provide a justification and complete the MFA prompt (if configured).
- Once activated, the user should now have temporary administrative access to the application.
- Verify that access is automatically revoked after the configured activation duration expires.
Screenshots
X
Conclusion
This blog post has illustrated how integrating Privileged Identity Management (PIM) into your existing Single Sign-On framework can fundamentally transform the security posture of your sensitive enterprise applications. By transitioning from standing, always-on access to just-in-time, time-bound, and approval-based privileges, you drastically reduce the attack surface and enhance accountability.
PIM provides the essential guardrails to ensure that administrative access to critical tools is not only convenient but also rigorously controlled. Embracing these advanced security measures goes beyond mere compliance; it fosters a more resilient and proactive security culture within your organization, protecting your most valuable digital assets from potential misuse or compromise.